Starfish drawing
Hello, my dear future Picassos of the sea ! So, you have decided to immerse your brushes in the immense ocean of art and explore the mysteries of the underwater world? Yes of course ! Otherwise, you wouldn't be here, clicking through this hilarious, yet incredibly informative guide to drawing a starfish . That's right, today we're going to show you how to conjure these starry wonders of aquatic life on paper . So, hold on to your pencils , it's going to be a real hurricane of laughter and creativity!
The starfish, or "star dancer of the waves", as I like to call it in my moments of weird poetry , is a fascinating subject. Your mission, if you accept it, is to capture its essence and transpose it onto your canvas, all while having fun. What ?! Do you think it's impossible? Pfff... You'll see, starfish are much funnier than they look!
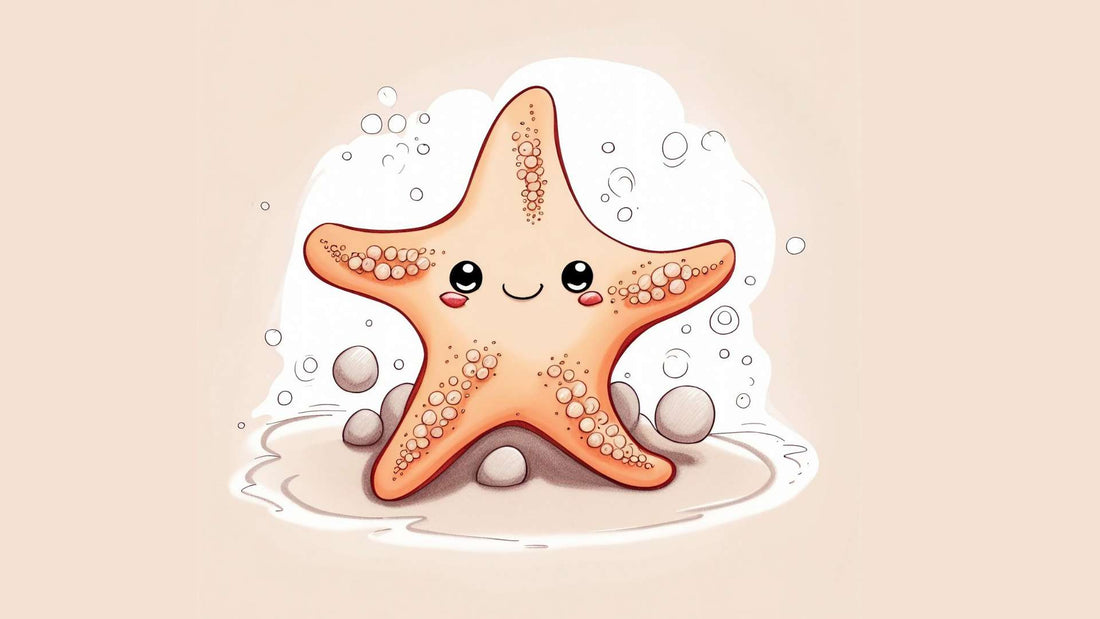
As you prepare your pencils , think of the way the starfish flourishes on the sea sand, how each arm seems to dance to its own rhythm. Imagine these arms moving like professional dancers in a dazzling aquatic performance . This is the image that you will learn to draw in our “starfish drawing workshop”.
In this universe where art meets laughter and starfish, you will learn unique drawing techniques , while having fun like a fish in water. But that's not all! Beyond the starfish, we explore all of marine biodiversity, from the “jellyfish drawing tutorial” to the “seahorse drawing lesson”. But for now, let's focus on our (starfish) star of the day.
So, if you are ready to take a humorous dive into the world of marine art, take on the challenge of drawing a starfish while having fun, and unleash the ocean artist in you, come aboard our submarine of creativity. Let us guide you through inky waves and paper reefs to a universe where every starfish is a source of inspiration.
The materials needed to draw a starfish very well ⭐
Knight's armor or artist's kit: the artist's essential equipment
If you thought knights had a lot of gear, wait until you see an artist 's kit! Don't panic, you won't need a sword or a shield to draw a starfish. However, you will need some essential tools. So, grab your backpack, we're going in search of the designer's treasures!
The Excalibur of drawing: the pencil
Every knight has his sword and every artist has his pencil . But unlike Excalibur, there's no need to remove it from a stone! A good old HB pencil will do for the initial drawing. Why HB? Well it's like Goldilocks and the Three Bears, it's not too hard, not too soft, it's just perfect for your starfish drawing.
Shadow and light: colored pencils and eraser
If the HB pencil is our brave knight, colored pencils are its noble quest: to bring life and color to our starfish. Don't forget your eraser , your faithful squire ready to correct all the little mistakes we make as humans. Yes, even Picasso did it!
Your kingdom: drawing paper
Drawing paper is your kingdom. This is where your starfish will come to life. Choose quality paper, thick enough to withstand the creative frenzy. Starfish like solid things!
The faithful friend: the pencil sharpener
Finally, don't forget every artist's faithful companion: the pencil sharpener . It's the friend that keeps your pencils sharp and ready to tackle any artistic challenge. It's the silent guardian, the vigilant protector, the dark hero of your artist's kit. Without it, all your pencils would be as useful as a sword without an edge!
There you go, you now have everything you need to complete your mission: draw a starfish like a true artist. So, put on your armor, grab your sword... uh... I mean, your pencil, and set out to conquer the underwater world!

Steps to draw a starfish very well ⭐
The first step: Sketch the contours of the starfish
Take your magic pencil out of your enchanted pencil case and enter the fantastic world of drawing! Our first step is to draw the outline of our starfish. Think of a sheriff's star, but with rounder, much more flexible arms. She's a dancer, after all, and she loves making graceful movements underwater.
The details: The dance of lines
Now that you've sketched out the general shape of your starfish, it's time to add the details . It's like learning a new dance. Each line is a step, each curve is a movement. Draw wavy lines on the inside of each arm to give a sense of texture and movement to your starfish.
“The killer detail”: adding texture to the starfish
Starfish are known for their unique textures. Their skin looks like a mosaic of small pearls . So how do we translate this into drawing? Draw small dots, almost like grains of sand , on each arm of the starfish. They don't have to be perfect, because in nature, imperfection is the key to beauty.
The big dive: coloring the starfish
Now, get ready to make your starfish dive into the ocean of colors . Choose bright, attractive colors to bring your creation to life. Imagine the reflections of the sun through the water and the colors of the sea. Use warm tones of coral, orange and pink to paint your starfish.
The coup de grace: accentuate the shadows and lights
Just like in a real underwater scene, light plays a crucial role in your drawing. With a darker pencil, accentuate the shadow areas of your starfish to give it a three-dimensional appearance. Then, with a lighter pencil or eraser, add highlights to simulate sunlight dancing on the water's surface.
The Finale: Adding an Environment to Your Starfish
Now that your starfish is ready to conquer the world, why not give it a world to conquer? Add background details to complete your underwater scene. A few shells here, an air bubble there, a curious clown fish in the corner, and voilà! Your own marine masterpiece is complete.
By following these steps, you can create an impressive underwater scene and bring your own starfish to life. So, let your creativity flourish and transform your sheet of paper into a magnificent underwater spectacle. And remember, the world is your oyster, so draw like no one is watching!
The master's advice for improving your drawing technique ⭐
Become the Sherlock Holmes of drawing: Observe
Before drawing your pencil faster than Lucky Luke, take the time to observe . Yes, yes, take out your magnifying glass and your eyeglass! Study the subject of your drawing carefully, spot the nuances of light and shadow, the curves and lines . And above all, keep in mind that the details are not bread crumbs that Little Thumb leaves, they are there to guide you towards a successful drawing!
A pencil is not a magic wand: practice
I know, it's disappointing, but unfortunately, you can't wave your pencil like Dumbledore's wand to draw perfectly. Magic is practice! Each stroke of the pencil is a small victory on the road to mastery of drawing. So draw and draw until your pencils start to sweat!
No, your eraser is not your enemy: experiment
Never consider your eraser your enemy. She's not here to point out your mistakes , but to give you a second chance to create something magnificent. So, don’t hesitate to experiment, make mistakes, and correct them. After all, it's by erasing that you become an eraser... er... designer!
Draw like Picasso: dare
Picasso didn't become Picasso by just coloring within the lines. So, dare! Try new techniques, explore different styles, use bold colors. Even if the result doesn't look like what you had in mind, you will have learned something new. And who knows, maybe your audacity will lead you to create your own artistic movement: “Picasso-ism”!
The yoga of the designer: relax
A tense drawing is like a poorly told joke, it doesn't make anyone laugh. So, relax! Take a deep breath, take your time, and remember that drawing should be fun, not a chore. The best drawing is not the one that is perfect, but the one that was created with love and relaxation . So, take a deep breath, and let the zen of drawing invade you!
Follow these master tips and you'll see, your drawing technique will improve faster than you can say "Van Gogh"! Take your courage in both hands (or one hand, the other holding the pencil), and embark on the artistic adventure !
Discover our coloring pages to download for free! 🎨


