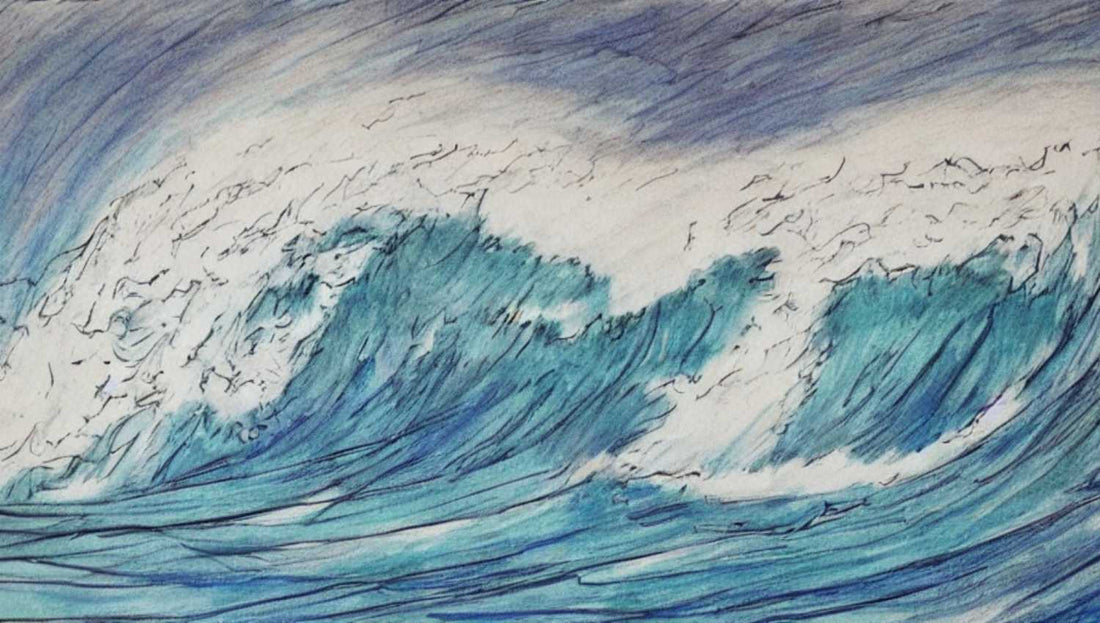
How to draw a wave?
Drawing a wave may seem difficult, but by following a few simple steps, you can create a realistic and detailed image. It's important to understand the shape and movement of the wave before you start drawing.
Start by studying pictures of waves and drawing them freehand to understand the lines of force and curves. It is also important to choose the right tools, such as a pencil or charcoal, to create the necessary shades and shadows . By following these steps, you will be able to create a realistic and detailed image of a wave.

Materials for drawing a wave
To draw a realistic and detailed wave, it is important to use the right tools . The most common materials for drawing waves are: pencils, charcoals , inks , felt-tip pens , brushes and markers.
Each of these materials offers unique advantages and disadvantages, so it is important to understand the specifics of each to choose the one that best suits your project . Pencils, for example, are ideal for drawing the lines of force and curves of the wave, while charcoals are excellent for creating shadows and shading.
Inks , felt-tip pens, brushes and markers can also be used to add details and colors. By choosing the right tools, you will be able to create a realistic and detailed image of the wave .
Pencils
Pencils are one of the most commonly used tools for drawing waves. They are available in a variety of hardness grades, ranging from 2H to 9B, which allows you to create fine, detailed lines as well as shadows and darker shades. Pencils are also easy to erase and edit, making them a great choice for sketching and preliminary sketches .
Charcoals
Charcoals are another popular tool for drawing waves. They are made from charred wood and come in different sizes and shapes. Charcoals create intense shading and shading and are particularly useful for oil or watercolor drawings. Charcoals can also be mixed with water to create wash effects.
Inks
Inks are a great choice for more detailed and colorful wave designs. Water- based inks are particularly popular because they are easy to mix and dilute. Inks create fine, precise lines and can be used to add detail and color to your drawings.
Felt pens and markers
Felt-tip pens and markers can also be used to draw waves. Fine tip pens and markers create fine, precise lines, while broad tip markers can be used to create larger areas of color. Pens and markers are also easy to use and transport, making them a great choice for field drawing.
Paint brushes
Brushes are a great choice for oil or watercolor wave drawings. Natural bristle brushes are best for oil paintings , while synthetic brushes are ideal for watercolor paintings. Brushes allow you to create unique textures and movement effects in waves, adding extra dimension to your drawing. It is important to choose quality brushes to ensure effective paint application and long life.
Techniques for drawing a wave very well
Drawing a wave realistically and in detail may seem difficult, but using the right techniques you can create a captivating image. It is important to understand the lines of force and curves of the wave, as well as the effects of light and shadow to create a realistic image.
Use various tools such as pencils, charcoals, inks, felt-tip pens, brushes and markers to add details and colors to your drawing.
Using techniques such as hatching, scratching, and compositing to create effects of movement and texture, you can create a captivating image of a wave.
Study the waves
Before you start drawing, it is important to study waves to understand their shape and movement. Look at pictures of waves and study the lines of force and curves. Also try drawing waves freehand to understand basic shapes.
Make preliminary sketches
Once you have a good understanding of the shape and movement of the waves, start making preliminary sketches to plan your design. Use pencils or charcoal to draw the lines of force and basic curves of your wave.
Add the details
Once you've finalized your preliminary sketch, use tools such as inks, markers, brushes and markers to add detail and color to your wave. Use tools of different sizes and shapes to create unique texture and movement effects.
Add shadows and shades
Use tools such as charcoals or pencils to add shadows and shading to your wave. Use techniques like hatching and scratching to create realistic light and shadow effects.
Finalize your drawing
Once you have finished drawing your wave, it is important to finalize it by adding any final details and correcting any mistakes . Use tools such as erasers to correct mistakes and fixatives to protect your drawing.

Step 1: Draw a Curve
Like all new drawing-related challenges, learning how to draw a wave will be easier if you break it down into smaller, more manageable steps .
With that in mind, we'll start simple in this step. The first line we will draw will be a very curved line , as it appears in the reference image. It will end in a very curved line that we will build on later.
Step 2: Draw Another Curved Line for Your Wave
Continuing to draw the wave, we will add an additional line below the one you just drew.
This line will start from below the final curved line on the right side that you drew in the first step and curve outward. Once this line is added, we can move on to step 3!
Step 3: Continue adding curved lines.
So far we've taken it slow and easy in this guide on how to draw a wave, so for this step we'll start adding more radical curved lines.
First, draw a more irregular, but still slightly curved line on the left side of the wave as you can see in the picture.
Then you can add a much more curved line below the line on the far right of your wave. You can also vary these lines a bit to give your wave drawing a unique twist!
Step 4: Now add a few more lines to your wave
Your wave drawing starts to look more and more like a real wave as you enrich it! In the next step we will add a combination of more or less straight and curved lines to your wave.
These lines will build on the lines you've already drawn so far and extend the wave on the left and right sides. The reference image will give you an idea of where these lines are, but again, don't be afraid to tweak them a little to make them more personal!
Step 5: Complete the final details with a little depth
Before we have fun coloring in the last step, we will continue to develop the details with other lines in this step. Your wave design is already very beautiful, but a few extra details will help give it more volume.
Instead of connecting these new details to the lines you have already drawn, these details will consist of small curved lines that will not connect to the main lines of your wave drawing. With these details, you have successfully learned how to draw a wave!
Step 6: Finish Your Wave Drawing with Color
Your wave drawing is already very beautiful at this stage! The only thing that could make it even more beautiful would be to add some beautiful colors! You might immediately think of a bright blue for those ocean waves, and while that looks great, there are also some possible variations.
Depending on the weather and water conditions, the ocean can be a little gray, a lighter blue, or even greener . You can also vary how you color the sky above. Yellows or oranges could make for a beautiful sunrise scene, while you could have a dark blue with a bright moon for a stunning night scene.
You can even draw and color fun extra details for your drawing. For example, you could have a dolphin or even a mermaid jumping from the waves! To color this drawing, if I had to do it, I would use water-based paint, as it is perfect for aquatic scenes.
But this is just one of the many ways of artistic expression you can use to complete this drawing, and I know whatever you choose will be amazing! You can choose from acrylic paints, watercolors , colored pens, pencils, colored pencils, and any other art tools you have on hand.
3 Additional Tips to Make Drawing Waves Easier
Make this easy wave to draw even easier with these helpful tips and tricks! Creating a wave design can often be more difficult than it seems. One way to make things easier is to simplify the drawing even more.
For example, we made the ends of each wave curl up quite sharply. This can make drawing a little more difficult, but you can definitely make it easier! By making them rounder, you'll be surprised how much simpler the drawing is. The result may be a little different, but it will still be just as beautiful!
If there are other ways to make things easier by changing the design, definitely do it! You can also make this wave sketch a little easier by adding more things around it. When waves are the only feature of the image, it means that all the attention is drawn to that aspect.
For example, you could add a sailboat riding the waves or perhaps dolphins diving between them. These elements could be added simply, but if parts of the design don't suit you, they will draw attention elsewhere. Plus, you have the added benefit of making this drawing of a wave even more interesting, because there's more to see! What additions could you make to the scene?
If you want to keep the focus on the waves but still want to make things easier, you can use some art tools and media to help you. To create waves, using paint and brushes will be a great way to make things easier. If you want to do this, you don't have to draw the lines like we show in the guide. You can draw light outlines with a pencil if you want to have guide lines!
Use larger brushes, dip them into your aquatic colors, and use large, curved strokes to create the appearance of waves. This is just a suggestion, but what other supports and techniques could you use? Your wave drawing is complete! With the coloring stage complete, you have reached the end of our guide on how to draw a wave. We really hope you had a lot of fun going on this drawing journey with us.
It's amazing to take on a new drawing challenge and see the finished product in front of you, and you can be very proud of your beautiful drawing. By following the steps in our guide and putting in the effort, you have achieved your goal!
But drawing and coloring is only half the fun. Now you can show us how creative you can be by adding elements that will make this drawing yours.
Whether it's sea creatures enjoying the wave, spectacular weather effects above it, or your artistic mediums of choice, we can't wait to see how you express your creativity!
We still have many more step by step drawing guides on our site for you to enjoy. We'll be releasing more soon, so be sure to check back often for many hours of drawing fun!
Secrets to drawing waves
Understanding the shape of the wave
To successfully draw a realistic wave, it is important to understand the shape and structure of the wave. Look at real waves or photos of waves to understand how they form and how they move . This will help you create a more credible and convincing image.
Use curves
Waves are characterized by soft , flowing curves . Use curves to draw the shape of the wave, making sure they look natural and realistic. You can use tools like Bézier curves to create precise curves.
Add details
Details are important to give texture and depth to your wave design. Use broken lines to suggest ripples and dips in the water, and play with shades of color to give depth to the wave.
Practice regularly
As with all skills , practice is essential to successfully drawing realistic waves. Take time to draw waves regularly and try new techniques to improve your skills.
Take inspiration from nature
To create realistic wave designs, it is important to take inspiration from nature. Observe real waves and note details such as shape, texture, color and movement. Use these observations to create more realistic and convincing wave drawings.
How to add details to give texture to the wave?
Adding details to your wave drawing is essential to giving texture and depth to your image. Details can help suggest ripples and dips in the water, as well as create a more realistic and convincing image.
There are many techniques you can use to add detail to your wave drawing, such as using broken lines , textures, color swatches, and shadows.
This part will show you how to use these techniques to add detail to your wave drawing and create a more realistic and convincing image.
Use broken lines
Use broken lines to suggest ripples and dips in the water. Broken lines can help create a more believable and convincing image by giving texture to the wave. It is important to vary the size and shape of the broken lines to create a more natural effect.
Use textures
Use textures to give depth to your wave drawing. You can use textures to suggest different parts of the wave, such as the crest, face, and bottom of the wave. Use different textures to create light and shadow effects that will help add depth to your image.
Play with color nuances
Shades of color can help give depth to your wave design. Use lighter colors for the higher parts of the wave and darker colors for the lower parts to suggest light and shadow. Use similar colors to create transparency and reflection effects.
Use shadows
Shadows can help give depth to your wave drawing. Use shadows to suggest different parts of the wave, such as the crest, face, and bottom of the wave. Use shadows to create light and shadow effects that will help add depth to your image.
Use texture tools
There are texture tools such as brushes , feathers , sponges , which can add details to give texture to the wave. They can add effects of friction, movement, transparency, depth, relief, etc. It is important to practice using these tools so that you can use them effectively.
It is important to remember that these techniques are tools to help you add detail to your wave drawing and it is important to continue experimenting and exploring new techniques to create unique and realistic images.
How to play with shades of color to give depth to the wave?
Playing with shades of color is an effective way to add depth and dimension to your wave design. Shades of color can help suggest light and shadow effects, as well as different parts of the wave.
Using light colors for the higher parts of the wave and darker colors for the lower parts can help create a more realistic and convincing image.
Use light colors for the upper parts
Use lighter colors for the highest parts of the wave to suggest light and give depth to your image. You can use colors like white, light blue or light green for the crests of the wave.
Use dark colors for the lower parts
Use darker colors for the lower parts of the wave to suggest shadow and give depth to your image. You can use colors like dark blue, dark green, or gray for the deeper parts of the wave.
Use similar colors to create transparency effects
Use similar colors to create transparency and reflection effects on the wave. This can help give depth to your image by suggesting the different layers of water.
Use warm and cool colors
Use warm and cool colors to create light and shadow effects. Warm colors, like orange and red, can help suggest light, while cool colors, like blue and green, can help suggest shadow.
Use shading and shading to add depth
Use shading and shading to add depth to your image. Shading and shading can help suggest different parts of the wave and different layers of the water. It is important to remember that the choice of colors may vary depending on the light and the ambiance you want to create. It's important to practice finding the color shades that best suit your drawing style.
How to draw inspiration from nature to create realistic wave designs?
Taking inspiration from nature is an effective way to create realistic wave designs. Real-life waves are complex and changing , and understanding their shape and movement is essential to drawing them believably .
Observing real waves, taking photos or videos of waves, studying different weather conditions, are ways to understand waves, their shape, movement , texture , color, etc. This article will show you how to use observation of nature to create realistic and convincing wave drawings.
Observe real waves
Observing real waves is a great way to understand their shape and movement . Take time to sit and watch the waves crash on the beach or on the rocks. Note details such as the shape, texture, color and movement of the waves. This will help you create more realistic and convincing wave designs.
Take photos or videos
Taking photos or videos of the waves is a great way to capture details you might miss by looking at them directly. Use these photos or videos to study details such as the shape, texture, color and movement of waves.
Study different weather conditions
Waves vary depending on weather conditions . Study the different weather conditions that can cause different waves, such as storms , strong winds, and high tides. This will help you understand how waves form and move under different weather conditions.
Use books and online resources
There are many books and online resources on the shape, movement and texture of waves. Use these books and resources to learn new wave drawing techniques and to understand the different shapes and movements of waves.
Practice regularly
Practice is essential to successfully draw realistic waves. Take time to draw waves regularly and try new techniques to improve your skills. Using all of these nature-inspired techniques, you will be able to create realistic and convincing wave designs.
How to use tools like Bezier curves to create precise curves?
Bézier curves are powerful tools for creating precise curves in your drawings. They create soft, natural curves that are ideal for drawing shapes such as waves.
Bézier curves are used in many drawing and graphic design software to create precise shapes . This part will show you how to use Bézier curves to create precise curves in your wave drawings.
Understanding checkpoints
Bézier curves are defined by control points that determine the shape of the curve. It is important to understand how these control points work to create accurate curves. Learn how to use these control points to create smooth, natural curves that are ideal for drawing shapes such as waves.
Use control points to create precise curves
Use control points to create precise curves that follow the shape of the wave. You can use control points to define the curves of the wave crest, face , and bottom . Use control points to create smooth, natural curves that follow the shape of the wave.
Use drawing tools to create precise curves
Use drawing tools like Bézier curves to create precise curves in your wave drawings. These tools allow you to create precise curves using control points and direction handles. Use these tools to create soft, natural curves that follow the shape of the wave.
Practice to improve your skills
Practice is essential to mastering the use of Bézier curves. Practice regularly to improve your skills and become more comfortable with these tools.
How can we observe real waves to understand their shape and movement?
Observing real waves is a fascinating way to understand their shape and movement. Waves are complex natural phenomena that are influenced by many factors such as winds, ocean currents and the seabed.
Waves can take many different shapes , ranging from large-scale breaking waves to smaller breaking waves. Waves can also move at different speeds and directions, making them even more difficult to understand.
Observing actual waves is important for understanding how they form and move, as it provides a better understanding of weather conditions and the forces that influence them.
By observing actual waves, one can also better understand how they can affect coastlines and coastal communities , as well as human activities such as shipping , fishing and tourism .
There are different ways to observe real waves. One of the most common methods is to go to a beach or on a boat to observe the waves directly. It is also possible to use instruments such as depth probes and buoys to measure wave characteristics, such as their height and speed.
The data collected can then be used to create mathematical models that help understand how waves form and move.
Direct observation
One of the most common methods of observing real waves is to go to a beach or on a boat to observe them firsthand. This method is simple and can be very informative, as it allows you to see the different shapes and movements of the waves up close. It is important to note that this method can be dangerous, as it is easy to get caught by the waves. It is therefore important to take the necessary precautions to avoid accidents.
Measurement of wave characteristics
It is also possible to use instruments to measure wave characteristics, such as their height and speed. Depth probes and buoys are commonly used tools to measure these characteristics. The data collected can then be used to create mathematical models that help understand how waves form and move.
Tracking waves using satellite images
Satellite images can be used to track waves on a large scale. These images can show how waves move across oceans, and how they are influenced by winds, currents and the seabed. Satellite images can also be used to track storms and cyclones that can cause dangerous breaking waves.
Historical data analysis
It is also possible to use historical data to understand actual waves. This data can include records of past storms and waves, as well as satellite images and wave measurements taken in previous years. This data can be used to create models that predict future waves and better understand their behavior.
Study of waves in the laboratory
Finally, it is possible to observe real waves in the laboratory, using wave pools to simulate ocean conditions. Waves can be studied using high-speed cameras to capture wave movements and shapes, as well as instruments to measure wave characteristics. This method provides a better understanding of the physical processes that occur when waves form and move, and can help develop
How to practice regularly to improve your wave drawing skills?
Regular practice is essential to improve your wave drawing skills . Wave drawing is a complex subject that requires a combination of theoretical knowledge and practical skills to master.
To become an experienced wave artist , it is important to understand the principles of perspective , composition , light and textures , as well as the different shapes and movements of waves.
Regular practice helps develop dexterity and hand coordination , as well as the ability to use different drawing tools, such as pencils, brushes and markers. It also helps develop the ability to reproduce the shapes and movements of waves precisely and realistically.
It is important to start with basic exercises to improve wave drawing skills. Basic exercises may include exercises for drawing lines and curves, as well as exercises for drawing simple shapes, such as circles and ovals . It is also important to practice reproducing images of real waves, using photographs or online images as reference.
It is important to vary techniques and styles to improve wave drawing skills. It is possible to vary the techniques by using different drawing tools, such as pencils, brushes and felt-tip pens, as well as different drawing techniques, such as pen drawing, charcoal drawing and pencil drawing. watercolor. It is also possible to vary the styles by experimenting with different artistic styles, such as realism, impressionism and expressionism.
Basic exercises
To improve your wave drawing skills, it is important to start with basic exercises. Basic exercises may include exercises for drawing lines and curves, as well as exercises for drawing simple shapes, such as circles and ovals. These exercises can help develop hand dexterity and coordination, as well as the ability to reproduce wave shapes and movements accurately.
Reproduction of references
It is also important to practice reproducing images of real waves, using photographs or online images as reference. This allows you to understand the different shapes and movements of waves, as well as the nuances of color and light . It is important to choose references that depict waves from different angles and in different weather conditions to improve understanding of the object .
Using different drawing tools
It is important to vary techniques by using different drawing tools, such as pencils, brushes and markers. This helps to discover the advantages and disadvantages of each tool, as well as to develop the ability to use different tools effectively. It is also important to practice using the different drawing tools to reproduce images of real waves.
Experimenting with different art styles
It's important to vary styles by experimenting with different artistic styles, such as realism, impressionism, and expressionism. This helps discover the advantages and disadvantages of each style, as well as developing the ability to use different styles effectively. It's also important to practice using different artistic styles to reproduce images of real waves.
Study of perspective theory, composition, light and textures
To improve wave drawing skills, it is important to understand the principles of perspective, composition, light and textures. Perspective theory helps to understand how objects are perceived in space, composition helps to organize elements in drawing space, light theory helps to understand how objects are lit and textures help to give a feeling of
How to use broken lines to suggest wrinkles and hollows in the water?
Broken lines are a powerful tool for suggesting water wrinkles and hollows in drawing. Broken lines create textures and movements that can suggest the movements and shapes of water. Broken lines can be used to suggest ripples on the water's surface, waves breaking on beaches, and swirls and swirls in currents.
To use broken lines to suggest ripples and dips in water, it is important to understand how waves and currents form and move. It is important to understand the forces that cause waves, such as winds and currents , as well as the factors that affect their shape and movement, such as seabed and coastal obstructions.
It is also important to understand the different techniques of drawing broken lines. It is possible to use drawing techniques such as hatching , pointillism and stippling to create textures and movements that suggest the ripples and troughs of water. It is also possible to combine different techniques to create more complex effects.
Understanding the forces that cause waves
To use broken lines effectively to suggest ripples and dips in water, it is important to understand the forces that cause waves. Waves can be caused by winds, currents, storms , and earthquakes , and it is important to understand how these forces affect the shape and movement of waves. This allows the waves to be realistically reproduced in the drawing.
Using Broken Line Drawing Techniques
There are different broken line drawing techniques that can be used to suggest the ripples and hollows of water, such as cross-hatching, pointillism , and stippling . These techniques create textures and movements that suggest the ripples and hollows of the water. It is important to practice using these techniques to understand their impact on drawing.
Combining different broken line drawing techniques
It is also possible to combine different broken line drawing techniques to create more complex effects. For example, we can use hatching to suggest ripples and hollows in the water, and stippling to add nuances of color and light. Combining different techniques allows you to create more realistic and expressive drawings.
Use references for inspiration
It is important to practice using broken lines to reproduce images of real waves, using photographs or online images as reference. This allows you to understand the different shapes and movements of waves, as well as the nuances of color and light. It is important to choose references that depict waves from different angles and in different weather conditions to improve understanding of the object.
Practice regularly
To use broken lines effectively to suggest wrinkles and dips in water, it is important to practice regularly. Regular practice helps develop dexterity and hand coordination , as well as the ability to use different broken line drawing techniques effectively. It's important to set aside time regularly to practice and improve your wave drawing skills.
How to use shadows to give depth to the wave?
Shadows are a powerful tool for giving depth to the wave in the drawing. Shadows create contrasts of light and color that can suggest the shape, texture and movement of the wave.
Shadows can be used to suggest the bumps and bumps of the water's surface, the dips and bumps of waves, and the lighting effects that occur when light reflects off the waves.
To use shadows to add depth to the wave, it is important to understand the principles of light and shadow. It is important to understand how light affects the color and texture of objects, as well as how shadows form and change throughout the day and depending on the position of the light source.
Understand the principles of light and shadow
To use shadows effectively to add depth to the wave, it is important to understand the principles of light and shadow. It is important to understand how light affects the color and texture of objects, as well as how shadows form and change throughout the day and depending on the position of the light source. This allows shadows to be realistically reproduced in the drawing.
Using Shadow Drawing Techniques
There are different shadow drawing techniques that can be used to give depth to the wave. These techniques create textures and movements that suggest the shadows and reliefs of the wave. It is important to practice using these techniques to understand their impact on drawing.
Use colors to add depth
It is important to understand how colors can be used to give depth to the wave. Colors can be used to suggest the reliefs , textures and movements of the wave. It is important to understand how colors can be used to create contrasts and lighting effects that can suggest the shadows and reliefs of the wave.
Conclusion on how to draw a wave
In conclusion, drawing a wave may seem difficult, but by following the basics of drawing and using the right tools such as graphite pen , chalk , pastels , markers, brushes, colored pencils, and pigments, you will be able to create a successful drawing.
It's important to understand proportions, contours, and blending techniques to bring your drawing to life. Drawing classes can help you learn basic techniques and improve your drawing skills.
Beginners can start by doing basic sketches and drawings before moving on to more complex projects like charcoal portraiture or oil painting. It's important to remember that to draw like a pro, you need to practice regularly and experiment with different drawing mediums and materials.


